
Growing great garlic: a guide to fall planting
Published at | Updated at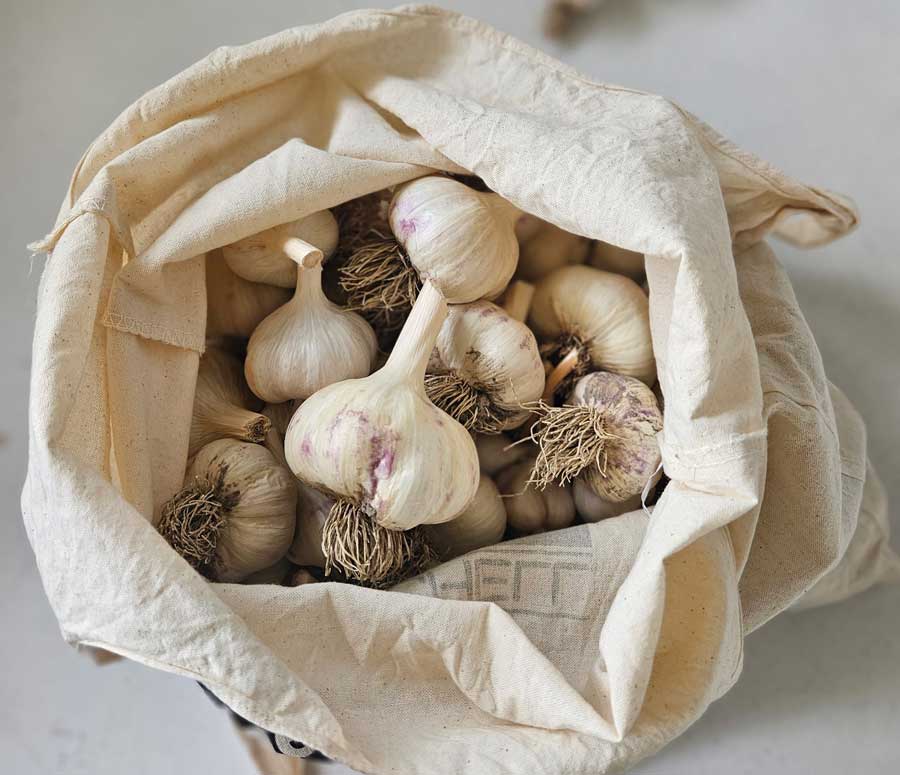
Garlic has many uses in cuisines from around the world. It is also an easy and rewarding crop for home gardeners.
Fall is the ideal time to plant garlic, as a cool period is necessary for the clove to sprout and develop roots over the winter, leading to large bulbs the following summer.

Planting in the fall, typically from early September to early October, allows the root system to develop even if you see little top growth.
Fall planting ensures a robust harvest next June/July. Spring plantings also work, but often result in smaller bulbs.
Understanding garlic types
Two main types of garlic (Allium sativum) are commonly grown: hardneck and softneck.
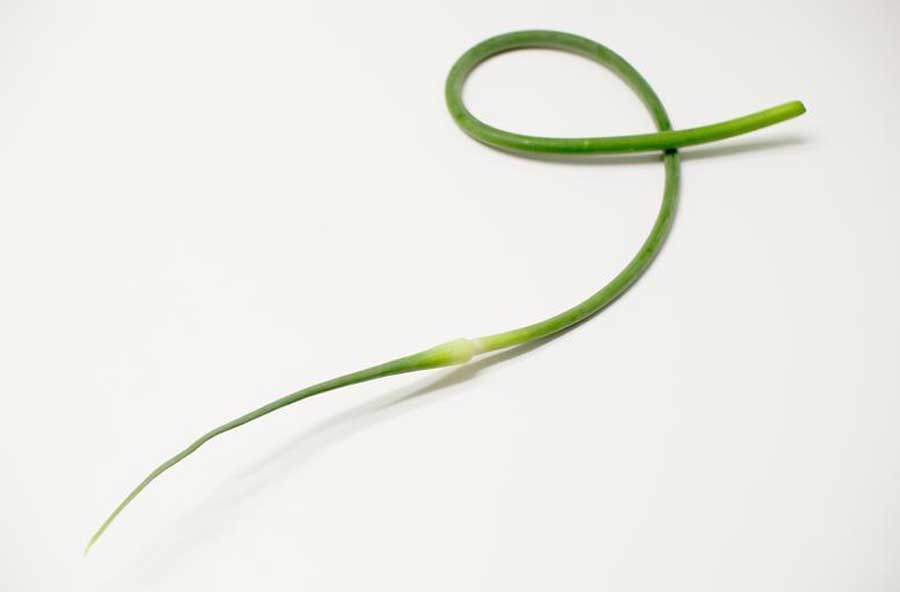
Hardneck garlic (Allium sativum var. ophioscorodon) is distinguished by a woody flowering stalk, called a scape, that grows through the center of the bulb. This type is very winter hardy and has a milder flavor, but has a shorter storage life, around 6 months.
Popular subtypes include Rocambole, Porcelain, and the longer-storing Purple Stripe. Removing the scapes when they begin to curl encourages larger bulb growth.
Tender young scapes (smaller than a pencil diameter) are tasty when sautéed with butter and salt, or added to a stir-fry.
Softneck garlic (Allium sativum var. sativum) lacks the central woody stalk, making its necks soft and ideal for braiding. It has the strongest flavor and stores very well, sometimes for up to 10-12 months. Softneck types in our climate benefit from a thick mulch covering for the winter.
A third variety, elephant garlic (Allium ampeloprasum), is actually more closely related to leeks. It produces huge bulbs with a mild flavor, but they do not store well.
Planting garlic in the fall
For a successful crop, select a site with full sun and fertile, well-drained soil. If it is rich in organic matter all the better, if not it would be beneficial to work compost into the top 6 inches of soil before planting.
Break apart healthy, disease-free bulbs into individual cloves just before planting, keeping the papery membrane on each clove intact. Plant only the largest cloves with the pointed end up, about 2 to 3 inches deep.
Space cloves 3 to 4 inches apart in rows that are 6 to 12 inches apart. After planting, cover the area with 4 to 6 inches of mulch, like straw or shredded leaves, to control weeds, conserve moisture, and protect the
bulbs from winter weather.
Sourcing garlic, especially in quarantine areas
When sourcing garlic for planting, it’s crucial to use clean, disease-free stock to prevent soil-borne diseases like white rot. White rot is a devastating fungal disease that can render soil unusable for growing garlic, onions, or other Allium species for up to 20 years.
To protect the agricultural industry, Idaho has established a quarantine in 20 counties (Ada, Bingham, Blaine, Boise, Bonneville, Canyon, Cassia, Elmore, Gem, Gooding, Jefferson, Jerome, Lincoln, Madison, Minidoka, Owyhee, Payette, Power, Twin Falls, and Washington plus Malheur County, Oregon).
Gardeners within this quarantine area are legally required to purchase and plant only Allium bulbs, sets, or
transplants that have been grown and certified as disease-free by the Idaho State Department of Agriculture (ISDA) from within the designated zone. Planting garlic or onions from a grocery store is illegal and can introduce plant diseases into your garden.
If you cannot source garlic starts from your local nursery, a list of ISDA-approved producers is available from the University of Idaho Extension office in Madison County, madison@uidaho.edu
Next Year’s Harvest
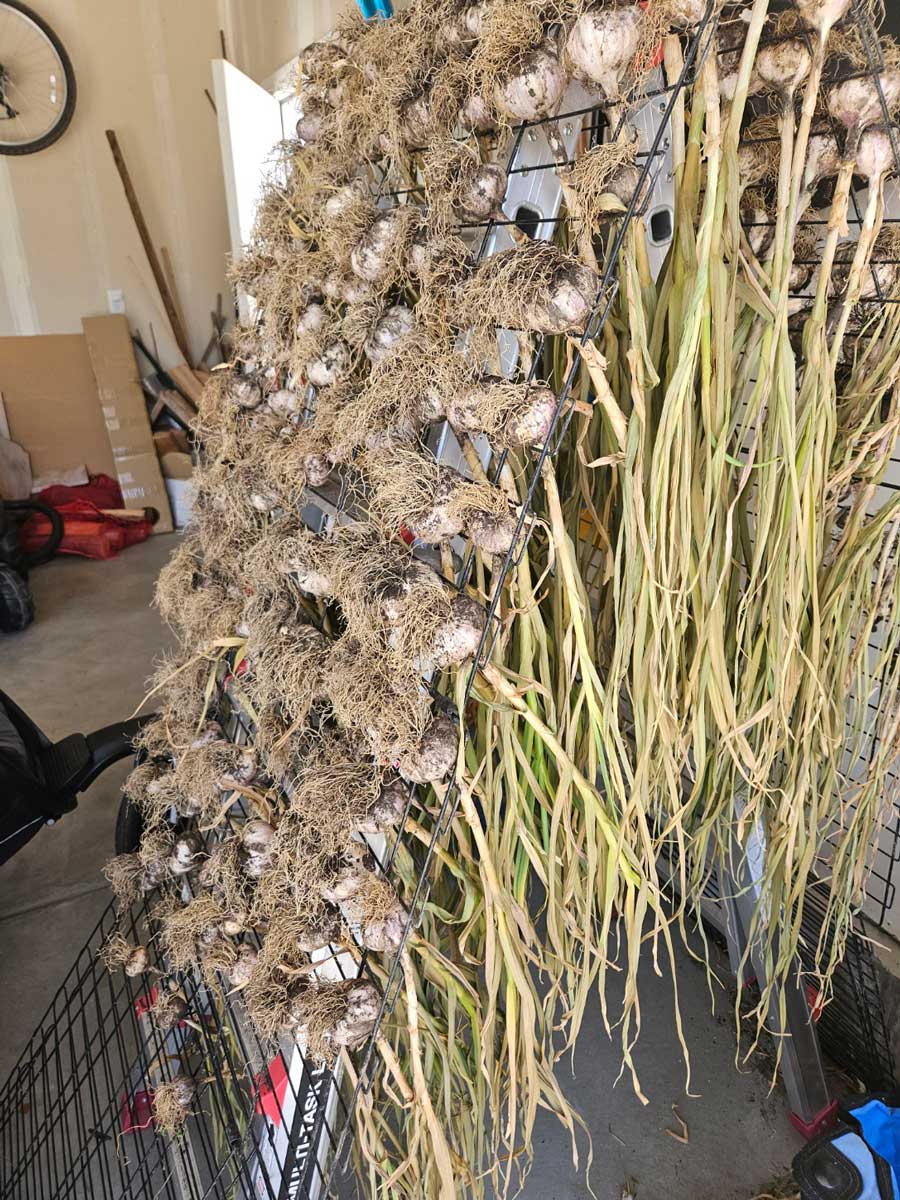
To properly harvest and dry garlic, begin when about half of the leaves on the plant have turned yellow and brown, but before they are completely dry.
Waiting too long can cause the bulbs to separate in the ground making them susceptible to rot. It is best to harvest in the cool temperatures of the early morning or late evening.
Loosen the soil around the plant with a garden fork and gently lift the entire plant from the ground, taking care not to separate the stalk from the bulb.
The garlic bulb bruises easily, so don’t throw it around. Brush off any soil while leaving the outer skin intact.
To dry or cure the garlic, place the entire plant, with the stalk intact, in a warm, dry, and well-ventilated area.
Keep them out of direct sunlight during the drying process. Placing the bulbs on a rack made from a window screen or poultry fencing is an easy solution. After two to six weeks, depending on your conditions, they will be fully cured. You will know when they are ready for storage when the skins are papery, and the roots and stalks are very dry to the touch.
At this point, you can trim the roots to about ¼ inch and cut the stalk back to 1-2 inches above the bulb for storage.
Enjoy!
Jared Gibbons is the Extension educator in Madison County. Contact him at jaredg@uidaho.edu.